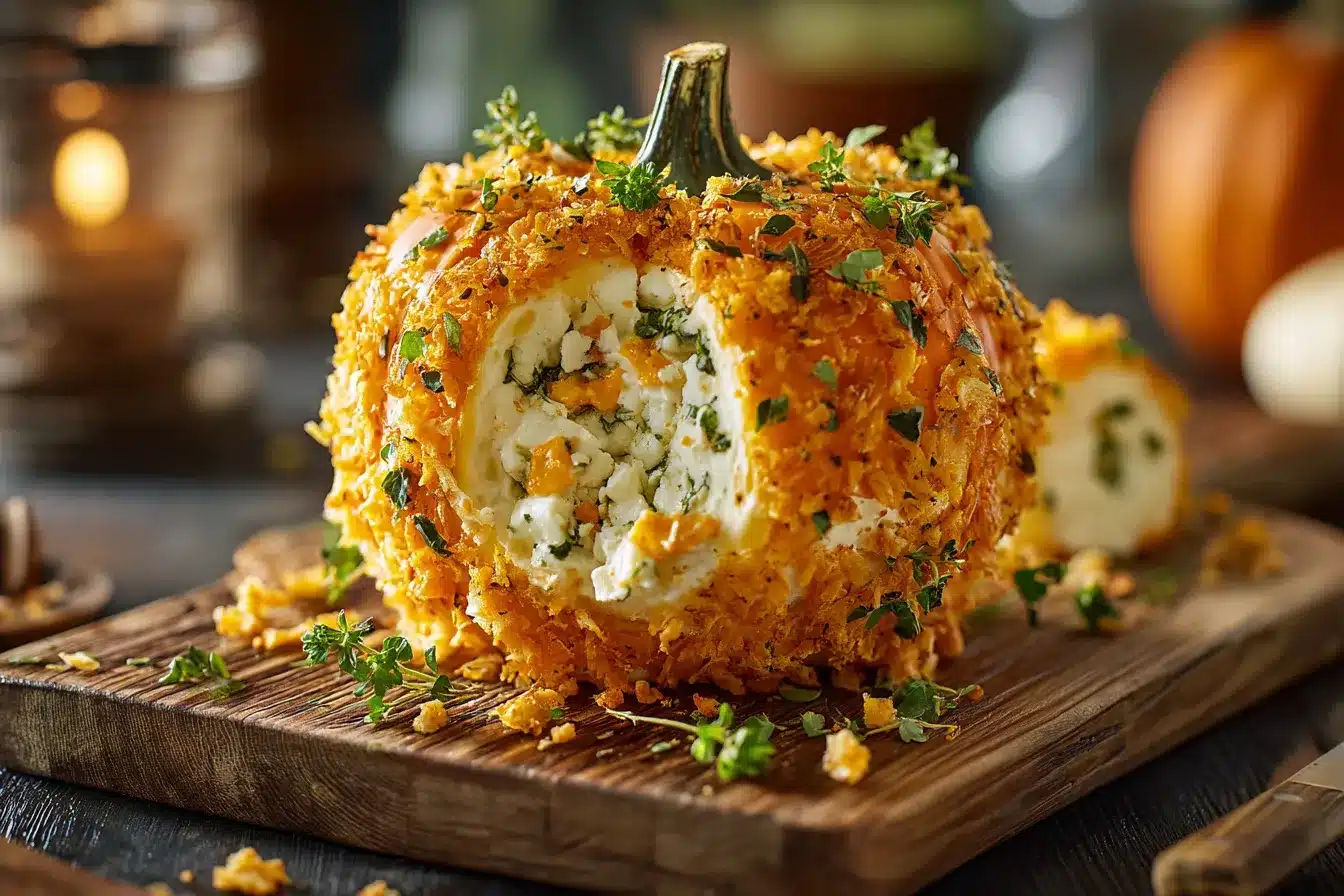
Pumpkin cheese ball recipe
Some appetizers taste great. A pumpkin-shaped cheese ball tastes great and stops the party — in the best way. This savory pumpkin cheese ball, shaped and decorated to look like a little pumpkin, is the fall appetizer that gets photographed before it gets eaten. It’s creamy, tangy, and packed with cheddar and warm spices, rolled in crunchy nuts and finished with a pretzel stem. Best of all, it’s genuinely easy: mix, chill, shape, decorate. This guide walks you through the classic recipe step by step, plus shaping tricks, coating options, sweet and savory variations, make-ahead tips, serving ideas, and food safety basics. Whether it’s your first cheese ball or your fiftieth, you’ll find something here to make it your best one yet.
Why a Pumpkin Cheese Ball Is the Perfect Fall Appetizer
The pumpkin cheese ball earns its place on every fall table for practical reasons beyond cuteness. It’s a make-ahead appetizer — in fact, it needs chilling time, so it’s designed for advance prep. It feeds a crowd from inexpensive ingredients: cream cheese, cheddar, and pantry spices. It’s endlessly adaptable to dietary needs and flavor preferences. And it solves the eternal party problem of the appetizer that looks impressive but took twenty minutes of actual work. Visually, it anchors a fall spread — place it center-board with crackers radiating outward and your appetizer table looks styled. Guests remember the pumpkin cheese ball long after they’ve forgotten the chips and dip. Cute matters, but only because the taste backs it up.

Ingredients: What You’ll Need
The classic pumpkin cheese ball needs just a handful of ingredients. For the base: two 8-ounce blocks of cream cheese (softened to room temperature — this is non-negotiable for smooth mixing), 2 cups of finely shredded sharp cheddar, 1 teaspoon each of garlic powder and onion powder, 1/2 teaspoon smoked paprika (this gives the orange hue), and salt and pepper to taste. For the coating: 1 cup of finely chopped pecans or walnuts, or crushed cheese crackers for a nut-free version. For decorating: a pretzel rod or stick for the stem, and a few fresh sage leaves or parsley for “leaves.” Optional mix-ins: 2 tablespoons of minced chives, a dash of Worcestershire sauce, or 1/4 cup of real bacon bits. That’s it — everything is available at any grocery store, and you likely own half of it already.

Choosing the Right Cream Cheese and Cheddar
Two ingredients carry this recipe, so choose them well. For cream cheese, use full-fat block cream cheese — not whipped, not low-fat, not the tub kind. Block cream cheese has the firm structure a cheese ball needs; whipped versions are too soft and low-fat versions weep liquid. Soften it properly: leave on the counter for 45-60 minutes until it gives easily when pressed. For cheddar, shred it yourself from a block. Pre-shredded cheese is coated in anti-caking starch that prevents smooth melting and blending — the texture difference in a cheese ball is noticeable. Sharp cheddar gives the best flavor punch; extra-sharp for cheddar lovers, mild if kids are the audience. White cheddar works but won’t give the orange color — add a bit more paprika if you go that route.

Step-by-Step: Mixing the Cheese Ball Base
Mixing is simple but order matters. First, beat the softened cream cheese alone — with a hand mixer or stand mixer — until completely smooth, about 2 minutes. Lumps now mean lumps forever, so don’t rush this. Add the shredded cheddar and beat until combined. Add the garlic powder, onion powder, smoked paprika, salt, and pepper, plus any optional mix-ins, and beat until evenly distributed. Taste and adjust: more salt? More paprika for color? This is your moment. The mixture should be firm enough to hold shape but soft enough to mold — if it’s too soft (warm kitchen), chill the bowl for 20 minutes before shaping. Transfer to plastic wrap, form a rough ball, and refrigerate at least 2 hours or overnight. Chilling firms the cheese for clean shaping.

Shaping Your Cheese Ball Into a Pumpkin
Here’s where the magic happens. Unwrap your chilled cheese mixture and place it on a sheet of plastic wrap. Form it into a round ball, then flatten the top and bottom slightly for a pumpkin profile. Now create the pumpkin ridges: wrap kitchen twine or thick rubber bands around the ball — 4 to 6 strands, evenly spaced, pulled snug — and let it chill another 30 minutes so the indentations set. Alternatively, press the lines in with the back of a butter knife or a chopstick. Remove the twine carefully; you’ll have perfect pumpkin segments. Smooth any rough spots with slightly damp hands. Don’t stress about perfection — real pumpkins are lumpy, and the coating covers a multitude of sins. The ridges are what sell the illusion, so make them defined.

The Stem: Pretzels, Peppers, and Creative Toppers
The stem is the finishing touch that makes people gasp. The classic: a pretzel rod pushed into the top center — brown, textured, and edible. For a greener look, use the stem end of a bell pepper (cut a 2-inch piece with the natural stem attached) — it looks remarkably like a real pumpkin stem. A cinnamon stick works beautifully and adds scent. Breadstick “stems” are another edible option. For leaves, tuck fresh sage leaves, flat-leaf parsley, or even a real (cleaned) pumpkin leaf around the stem base. Push the stem in firmly but gently — if the cheese is well-chilled, it holds. Add the stem after coating but just before serving so it sits cleanly. This one detail elevates the cheese ball from “shaped cheese” to “how did you DO that?”

Coating Options: Nuts, Herbs, and Everything Seasoning
The coating adds flavor, texture, and the orange color — don’t skip it. Classic: finely chopped toasted pecans or walnuts, pressed gently all over. Nut-free: crushed cheese crackers, crushed cornflakes, or finely crushed tortilla chips. For color: mix smoked paprika into the coating, or use crushed orange-tinted crackers. Everything-bagel seasoning gives a savory, seedy crunch that’s excellent. Fresh herbs (finely minced parsley, chives) make a green-flecked coating for a different look. Toast nuts before chopping for deeper flavor — 8 minutes at 350°F, watching carefully. Chop finely and evenly; large chunks fall off. Press the coating on with your hands over a sheet pan, rotating the ball to cover completely. Chill 30 minutes after coating to set everything in place.

Sweet vs. Savory: Two Flavor Directions
The savory classic is the crowd-pleaser, but a sweet pumpkin cheese ball (really a cheese “dip” ball) is a sleeper hit for dessert tables. Savory base: cream cheese + cheddar + garlic, onion, paprika as above. Sweet base: cream cheese + 1/2 cup pumpkin puree + 1/2 cup powdered sugar + 1 teaspoon pumpkin pie spice + 1 teaspoon vanilla. Coat the sweet version in crushed gingersnaps, graham crackers, or cinnamon sugar. Serve sweet with apple slices, graham crackers, and vanilla wafers. The shaping technique is identical — ridges, stem, leaves all work the same. You can even make both for a party: one savory pumpkin, one sweet pumpkin, side by side. Label them clearly unless you enjoy watching guests’ surprised faces (savory when expecting sweet is a memorable moment, but not necessarily a pleasant one).

Make-Ahead Tips for Parties
The cheese ball is a make-ahead champion — plan accordingly. The base can be mixed and shaped (with twine ridges) up to 3 days ahead; wrap tightly in plastic wrap and refrigerate. Add the coating the day of serving for maximum crunch — nut coatings soften over time in the fridge. Insert the stem and leaves just before serving. If you must coat ahead, choose cracker or crumb coatings over nuts; they hold texture better. Transport in a container with the ball on a small plate, stem separate, and assemble on arrival — five minutes, zero stress. Never leave the finished cheese ball at room temperature more than 2 hours (1 hour if it’s warm). For all-day events, serve half and keep half chilled, swapping mid-party. Your future self, calmly greeting guests instead of frantically shaping cheese, will thank you.

Serving Suggestions: Crackers, Veggies, and Breads
A great cheese ball deserves great dippers. Crackers: buttery round crackers, whole-grain crackers, and cheese crackers echo the flavors; provide variety in shape and texture. Breads: sliced baguette (toast it lightly), pita chips, and pretzel crisps are sturdy enough for thick cheese. Vegetables: celery sticks, bell pepper strips, cucumber rounds, and cherry tomatoes add freshness and color — and give gluten-free guests options. Arrange dippers radiating around the cheese ball on a large board or platter, grouping by type. Add visual interest with scattered nuts, dried cranberries, and fresh herbs. Provide a dedicated cheese knife or spreader — guests shouldn’t have to saw at your pumpkin. Refill dippers before they run out; an empty cracker basket next to a full cheese ball is a party foul. For visual abundance on a budget, fill gaps on the board with rosemary sprigs, dried orange slices, and small clusters of grapes — inexpensive fillers that make the whole spread look professionally styled.

Mini Pumpkin Cheese Balls for Individual Servings
Mini pumpkin cheese balls are adorable, hygienic, and perfect for parties where guests graze. Make the standard base recipe, then divide into 12-16 portions (a small cookie scoop gives uniform minis). Roll each into a ball, create mini ridges with a toothpick or the back of a knife, and chill. Coat in your chosen coating, then top each with a small pretzel stick piece and a tiny sage leaf. Serve on a platter with individual crackers or pretzel sticks stabbed in for easy grabbing — no double-dipping concerns. Minis also work as salad toppers, lunchbox surprises, and Thanksgiving place-setting favors (one per plate with a name tag). They take a bit more hands-on time than one big ball, but the “aww” factor is exponentially higher.

A Lighter Version: Lower-Fat Swaps That Work
You can lighten the cheese ball without ruining it — with realistic expectations. Swap one block of cream cheese for Neufchâtel (1/3 less fat, nearly identical texture) — but keep one block of full-fat cream cheese for structure; going all-Neufchâtel makes shaping tricky. Use reduced-fat cheddar for half the cheddar, keeping half full-fat for flavor. Boost flavor to compensate: extra garlic powder, smoked paprika, fresh chives, and a dash of hot sauce make up for lost richness. Coat with herbs and spices rather than nuts to cut fat further. Be honest with yourself: a lightened cheese ball is delicious, but it’s not identical — and that’s fine. Don’t attempt fat-free cream cheese; the texture fails completely and nobody is happy. Better a smaller portion of the real thing than a sad imitation.

Common Mistakes and How to Avoid Them
Cheese balls are forgiving, but a few mistakes trip people up. Mistake one: not softening the cream cheese — cold cream cheese makes lumps that never blend out. Fix: plan the 45-minute counter softening. Mistake two: over-mixing after adding cheddar — it gets gummy. Fix: mix just until combined. Mistake three: skipping the chill — warm cheese won’t hold ridges. Fix: respect the refrigeration times. Mistake four: coating too early — soggy coating. Fix: coat the day of serving. Mistake five: under-seasoning — bland cheese ball is the saddest appetizer. Fix: taste the base before shaping and be generous with salt and spices. Mistake six: too-large serving portions — guests demolish it before photos. Fix: make minis or guard it until the photographer (you) is done.

Storing Leftovers Safely
If you somehow have leftovers, store them right. Wrap the cheese ball tightly in plastic wrap (or transfer to an airtight container) and refrigerate — it keeps 3-4 days. The coating softens over time; revive leftovers by rolling in fresh coating before re-serving. Remove the pretzel stem and fresh herb garnishes before storing; they get soggy. Don’t freeze a finished cheese ball — cream cheese texture suffers, turning grainy and watery on thawing. You can freeze the uncoated base for up to a month if needed, but fresh is notably better. For food safety, track time at room temperature: 2 hours max total (including serving time). When in doubt, throw it out — dairy-based appetizers aren’t worth the risk. Label with the date so there’s no guessing.

Pairing: Drinks That Go With Your Cheese Ball
The right drink elevates the cheese ball from snack to experience. Wine: a crisp apple-forward white (unoaked Chardonnay, Pinot Grigio) or a light fruity red (Beaujolais, Pinot Noir) complements the rich cheese without overwhelming. Beer: amber ales, Oktoberfest lagers, and pumpkin ales are natural fall partners. Cider — hard or sweet — is the thematic bullseye. Non-alcoholic: sparkling apple cider, ginger beer, or a cranberry spritzer. For the sweet version, pair with dessert wine, coffee, or hot apple cider. Serve drinks that contrast the richness: acidity and bubbles cut through creamy cheese beautifully. Set up a small drink station near the appetizer table so pairing happens naturally. The pumpkin cheese ball plus the right pour is peak autumn entertaining.

Kid-Friendly Adaptations
Kids love the pumpkin cheese ball — it’s cheese shaped like a pumpkin; what’s not to love? Adaptations for young palates: use mild cheddar instead of sharp, skip the onion powder (or reduce it), and go easy on the black pepper. Let kids help with age-appropriate steps: pressing the coating on, placing the stem, arranging crackers around the platter. Mini cheese balls are perfect kid portions. For the coating, kids prefer crushed cheese crackers or cornflakes over nuts. Serve with familiar dippers: pretzels, apple slices, familiar crackers. One warning: the twine-ridge technique fascinates kids, but keep little fingers away from tightly-wrapped twine. Making the cheese ball together becomes a fall tradition kids ask for — and it’s genuinely a recipe they can graduate to making themselves.
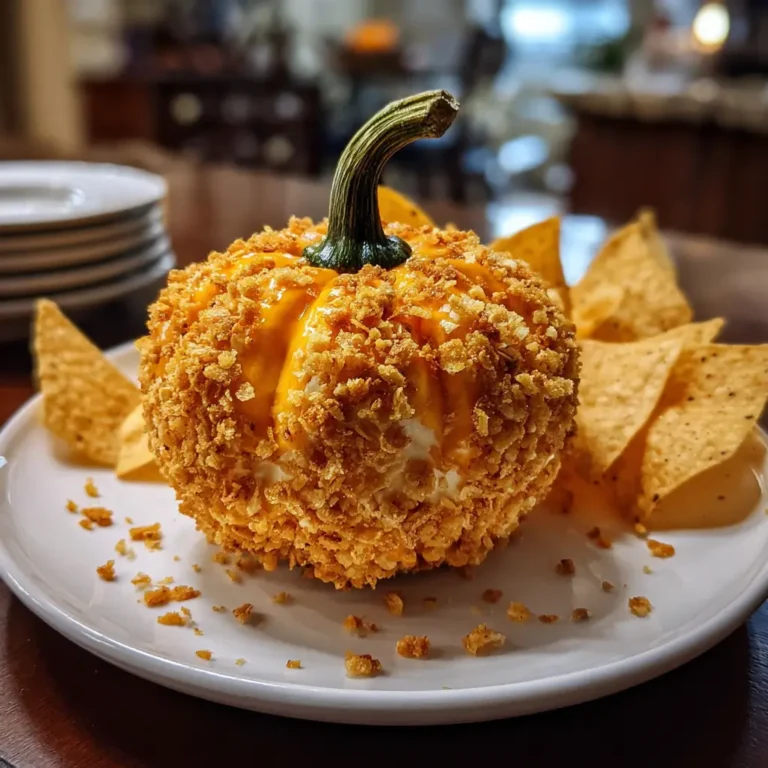
Holiday Variations: Thanksgiving and Halloween Twists
The pumpkin shape adapts to both major fall holidays. For Halloween: add a jack-o’-lantern face using black olive pieces or cut nori (seaweed) shapes pressed onto the cheese before coating — spooky and edible. Serve on a black platter with “spider” (olive-and-pretzel) garnishes. For Thanksgiving: go elegant — coat in finely chopped herbs and toasted pecans, top with a real-looking pepper stem, and serve on a wooden board with figs, honey, and artisan crackers. A “turkey” cheese ball (same base, shaped round with cracker tail feathers) is the Thanksgiving alternative if you’ve pumpkin’d out. Christmas? Shape it round, coat in herbs, top with a rosemary sprig — instant wreath cheese ball. One base recipe, four holidays. That’s versatility.

Cheese Ball Food Safety Basics
Dairy-based appetizers demand food safety attention — here’s the short version. Keep cold foods cold: the cheese ball should be refrigerated until serving and not sit out more than 2 hours (1 hour above 90°F, unlikely in fall but noted). Use clean hands and utensils at every stage; wash produce garnishes thoroughly. If transporting, use a cooler with ice packs — a warm car ruins both texture and safety. Don’t “refresh” a cheese ball that’s sat out all day by re-chilling it; the 2-hour clock doesn’t reset. When serving a crowd, the two-batch method (half out, half chilled) keeps everything safe and fresh. These aren’t fussy rules — they’re the difference between a great party and a regrettable one. When in doubt, throw it out applies doubly to dairy.

Scaling the Recipe for a Crowd
Feeding 30 instead of 10? Scale smart. The base recipe serves 10-12 as an appetizer; double it for 20-25, triple for 35-40. When scaling, mix in batches — a triple batch overwhelms most stand mixers; make three single batches and combine for shaping. For large crowds, consider making two medium pumpkins instead of one giant one: they’re easier to shape, chill faster, and you can place them at different tables. Minis scale beautifully for crowds — a triple batch makes 40+ minis. Increase dippers proportionally: plan roughly 6-8 crackers per person plus veggies and bread. Make extra coating; running out mid-roll is frustrating. And recruit help for shaping day — an assembly line (one shapes, one coats, one decorates) turns a big batch into a fun prep party.
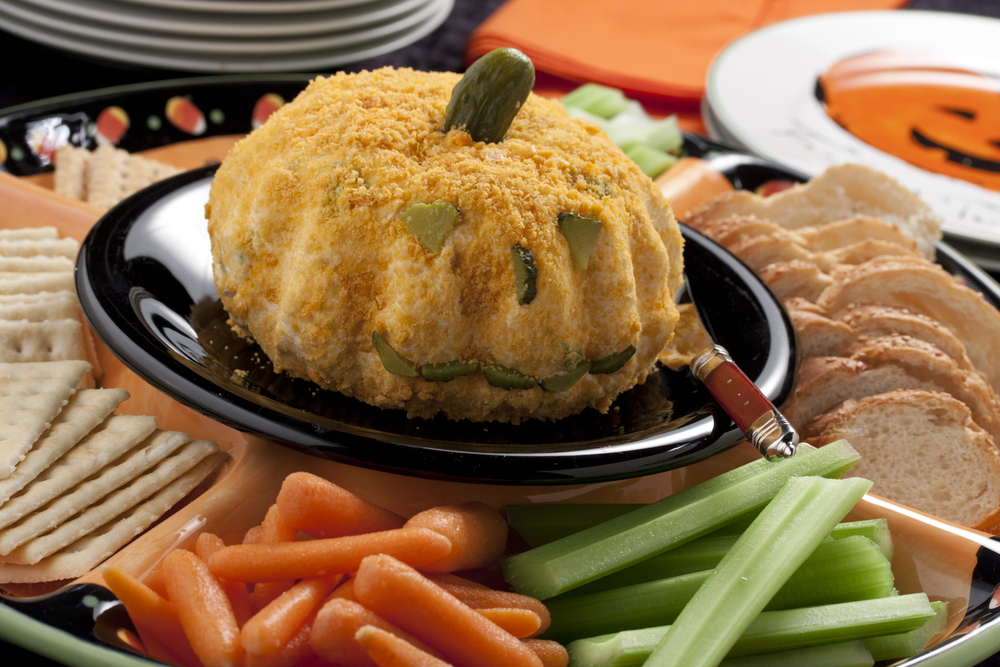
Recipe Card: Classic Pumpkin Cheese Ball
Here’s the complete recipe in one place. Ingredients: 16 oz block cream cheese (softened), 2 cups finely shredded sharp cheddar, 1 tsp garlic powder, 1 tsp onion powder, 1/2 tsp smoked paprika, 1/2 tsp salt, 1/4 tsp black pepper, 2 tbsp minced chives (optional). Coating: 1 cup finely chopped toasted pecans. Decoration: 1 pretzel rod, fresh sage leaves. Instructions: (1) Beat cream cheese until smooth, 2 minutes. (2) Add cheddar and seasonings; beat until combined. Taste and adjust. (3) Wrap in plastic, form a ball, chill 2+ hours. (4) Shape pumpkin ridges with twine; chill 30 minutes; remove twine. (5) Roll in pecans, pressing to adhere. (6) Insert pretzel stem, tuck sage leaves. Serve with crackers, veggies, and bread. Makes 10-12 servings. Prep: 20 min + chilling. The recipe doubles and triples cleanly — see scaling notes above.

The pumpkin cheese ball is proof that the best party food works as hard on looks as it does on flavor. Mix the base, chill it well, shape those ridges with confidence, and finish with a pretzel stem — you’ll have an appetizer that tastes like fall and looks like you hired a food stylist. Make it ahead, serve it proudly, and watch it disappear. Then make a second one next weekend, because someone will ask. They always ask.

I am Talha Sikandar, a professional writer with a passion for general blogging. With years of experience in content writing and research, I founded Meaniingly.com to deliver well-researched, informative, and user-friendly articles on diverse topics.