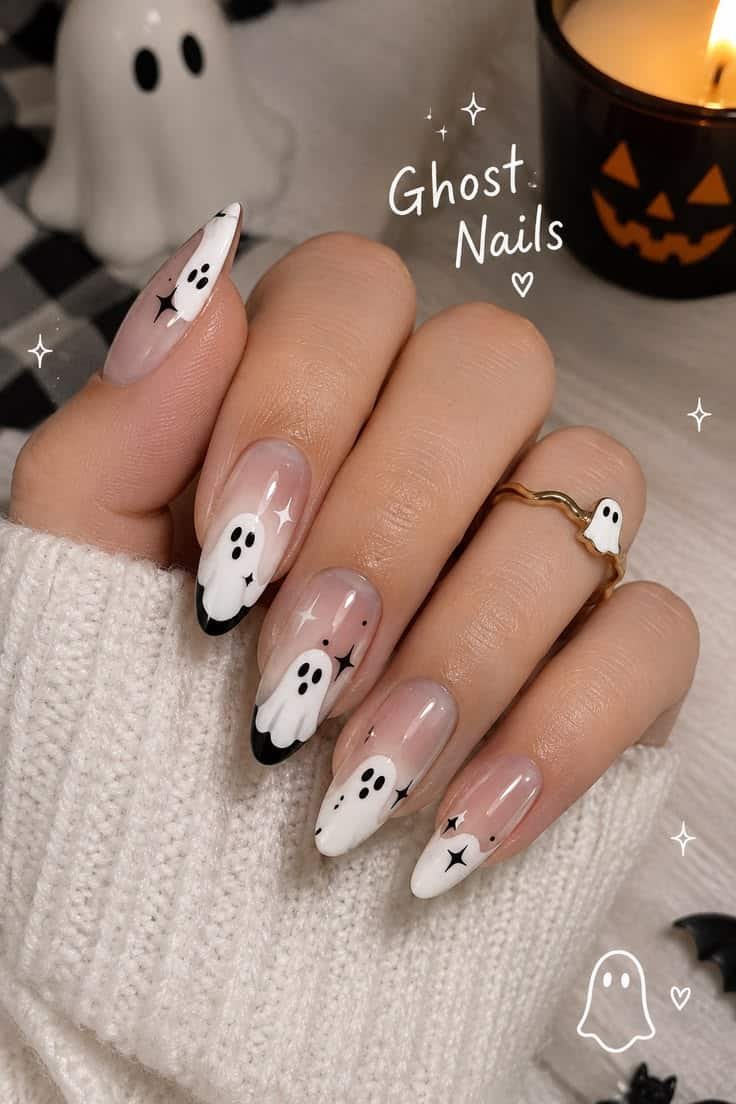
Halloween is the one time of year when your manicure can be playful, eerie, and a little bit silly all at once, and nothing captures that mood quite like ghost nails. Ghost Halloween nails are adorable, easy to recognize, and surprisingly versatile, ranging from sweet pastel sheets to haunting glow-in-the-dark spirits. Whether you are a beginner with a steady dotting tool or an experienced nail artist, there is a ghost design for you. This guide explores styles, techniques, supplies, and care tips so you can create a manicure that is hauntingly beautiful.

Why Ghost Halloween Nails Are So Popular
Ghost nails have become a Halloween staple because they strike the perfect balance between spooky and charming. Unlike gory or intricate designs, a ghost is simple, friendly, and instantly readable, even from across the room. People love them because they work for every age and every occasion, from office parties to school events and costume nights. They are also forgiving for beginners, since a ghost shape is basically a rounded dome with a wavy bottom edge and two dots for eyes. Social media has played a big role too, with creative variations appearing every October. The result is a trend that feels fresh each year while remaining easy to recreate at home.

What Are Ghost Halloween Nails?
Ghost Halloween nails are manicures that feature ghost illustrations, usually in white or translucent shades, painted on one or several nails. The classic design includes a rounded head, a wavy hem, and simple black eyes, sometimes with a small mouth for extra personality. However, the idea has expanded far beyond that basic form. You can find ghosts peeking from cuticles, floating across gradient skies, hiding behind pumpkins, or wearing tiny bows. Some designs focus on a single accent nail, while others cover the entire hand with a haunted scene. The appeal lies in its flexibility: you can adjust the color, style, and level of detail to match your personality and skill level.

Classic White Ghost Nails
The classic white ghost on a dark base remains the most iconic option. A black or deep charcoal background makes the white shape pop dramatically, giving a high-contrast, storybook effect. To create it, paint the nails black, let them dry fully, then use a dotting tool to build the ghost’s body in white. Add two small black dots for eyes and, if you like, a tiny oval mouth. This style looks wonderful on short and medium nails and suits every skin tone. For a polished finish, seal with a glossy top coat. The simplicity of the design makes it ideal for first-time nail artists who want a recognizable Halloween look without complicated techniques.

Cute and Kawaii Ghost Designs
If you prefer a sweeter take on Halloween, kawaii ghost nails are the answer. These designs feature round, chubby ghosts with big eyes, rosy cheeks, and tiny smiles. Soft touches like blush-pink cheeks, little hearts, or small stars make them look playful and endearing. Pair them with pastel backgrounds in lavender, mint, or peach for a candy-like atmosphere. Kawaii ghosts look especially charming on short square or round nails, where their shapes appear compact and cute. You can also add sparkles or tiny rhinestones around them for extra whimsy. This style is perfect for anyone who loves Halloween but would rather avoid anything too scary or dark.

Spooky Ghost Faces with Dark Backgrounds
For a more dramatic effect, try ghosts with expressive, spooky faces. Instead of simple dot eyes, draw hollow eyes, stretched mouths, or surprised expressions. Dark backgrounds in black, deep purple, or midnight blue heighten the eerie mood. You can add subtle shading around the ghost using a gray polish or a soft brush to create a misty, haunting glow. A few thin cracks or smoky swirls in the background can enhance the atmosphere. This approach works nicely on medium to long nails, where there is more space to build detail. It suits those who want their Halloween manicure to feel cinematic, mysterious, and slightly unsettling without becoming gruesome.

Black and White Ghost Manicure
A strictly black-and-white palette gives ghost nails a graphic, modern appearance. Alternate black nails with white ones, placing a ghost on each in reversed colors for a striking checkerboard effect. You can also combine stripes, polka dots, or checkered patterns with ghost motifs for a retro, comic-book vibe. Because the palette is limited, the design feels cohesive and clean, and it pairs easily with almost any costume. A matte finish gives the look a sleek, contemporary edge, while a glossy finish enhances contrast. This style is especially good for people who like monochrome fashion and want a Halloween manicure that still looks stylish and wearable beyond the holiday itself.

Glow-in-the-Dark Ghost Nails
Glow-in-the-dark polish takes ghost nails to the next level by turning them into a real spectacle after sunset. Apply a glow polish or powder to the ghost shapes, then charge them under bright light for a few moments. In dim rooms, they emit a soft green or blue glow that feels delightfully spooky. This effect is a hit at parties, haunted houses, and trick-or-treating, where the dark surroundings let your nails shine. To maximize brightness, apply several thin layers instead of one thick coat. Use a dark background so the glow stands out clearly. Always check the product label to ensure it is suitable for nail use and safe for your skin.

Pastel Ghost Nails
Pastel ghost nails reimagine Halloween with a gentle, dreamy palette. Instead of white ghosts on black, imagine soft lilac, baby blue, or blush-pink spirits floating across milky backgrounds. The look is light, whimsical, and perfect for those who find traditional Halloween colors too heavy. Pastel nails also feel versatile, so you can wear them from early October through the end of the season. Add tiny stars, moons, or clouds to enhance the magical mood. A shimmer top coat gives pastel ghosts a pearly glow, like fairy-tale spirits drifting through the night. This style is especially popular with people who prefer a soft aesthetic and want a manicure that feels playful rather than creepy.

Ghost French Tips
Combining ghosts with a French manicure results in a clever, understated design. Instead of a straight tip line, create a wavy edge that mimics the hem of a ghost’s sheet. White tips on a sheer pink or black base look polished, while colored tips in purple or orange add a festive twist. You can add two tiny eyes just above the wavy line so each nail looks like a peeking ghost. This option feels subtle enough for the workplace yet still shows Halloween spirit. It also grows out gracefully, since the design sits at the tips. If you love classic French nails but want a seasonal update, this is a wonderful choice.

Ghost Nails with Pumpkins
Ghosts and pumpkins are a natural pair, and together they create a balanced, festive manicure. Use orange pumpkins with simple stems and carved faces on some nails, and ghosts on others for a playful mix. A black or deep purple base makes both motifs stand out vividly. You can also design a scene in which a ghost peeks from behind a pumpkin for added storytelling. Keep the color palette tight, with orange, white, black, and perhaps a touch of green, to maintain a cohesive look. This combination is widely recognized as quintessential Halloween and works wonderfully for family events, school celebrations, and casual seasonal outings.

Ghost and Bat Combinations
Adding bats to ghost nails brings a more gothic atmosphere to the design. Small black bat silhouettes against a twilight gradient, paired with white ghosts, create a night-sky scene across the fingers. You can use a purple-to-black ombre as the background and add a pale moon on one nail for depth. Bats are easy to paint using a fine brush or can be applied as stickers for precision. The contrast between cute ghosts and sharp bat wings gives the design a pleasing balance of sweet and spooky. Keep the placement airy so each motif has room to breathe, and finish with a glossy top coat for a smooth, polished result.

Chrome and Glitter Ghost Nails
For a glamorous Halloween look, add chrome or glitter to your ghost design. A chrome base in silver, gunmetal, or deep purple gives the nails a futuristic, mirror-like depth, and white ghosts appear to float on top. Alternatively, use a glitter gradient at the tips to simulate magical dust surrounding the spirits. Holographic powders also add an otherworldly sparkle that suits the supernatural theme. This style is ideal for parties, concerts, and nights out where you want your manicure to catch the light. To avoid overwhelming the design, keep ghost shapes simple and let the finish provide the drama. A strong top coat helps seal glitter and prevents snagging.

Minimalist Ghost Nails
Not everyone wants a full-on Halloween manicure, and minimalist ghost nails offer a discreet alternative. Choose a neutral base, such as nude, taupe, or soft gray, and add a single tiny ghost on the ring finger or thumb. Another option is a small outline-only ghost drawn with a thin black line, giving a delicate, modern feel. You can also place a micro ghost near the cuticle or edge for a subtle surprise. This approach is perfect for office environments and for people who like to keep their nails understated. It is also quick to create, which makes it a great choice when you want a festive touch without spending hours on detailed nail art.

Ghost Nails on Short Nails
Short nails are an excellent canvas for ghost designs, provided you scale your artwork appropriately. Choose smaller, rounder ghosts and avoid overly detailed faces that may look crowded. A single ghost on each nail, or alternating ghosts with solid colors, keeps the design tidy and readable. Dark bases make the ghosts stand out even on limited space. Short nails are also practical, as they are less prone to breakage during busy Halloween events. If your nails are very short, consider placing ghosts on just two or three fingers and leaving the rest plain. The result will look intentional, neat, and playful without feeling cramped.

Ghost Nails on Long Nails
Longer nails offer more room for creativity, allowing you to paint larger ghosts, intricate faces, or complete haunted scenes. You can create a tall, floating ghost with a wavy hem that stretches along the nail, or build a graveyard background with tiny tombstones and moonlight. Almond, coffin, and square shapes all work well, depending on your preference. With extra space, you can experiment with gradients, shading, and layered effects that add dimension. Remember that longer nails require careful maintenance, so use a strong base coat and a durable top coat to protect your design. This is a great option for people who enjoy detailed nail art and love making a bold seasonal statement.

Easy DIY Ghost Nail Tutorial
Creating ghost nails at home is easier than it looks. Begin by shaping and cleaning your nails, then apply a base coat. Paint two thin coats of your chosen background color and let them dry completely. Using a dotting tool dipped in white polish, place a larger dot near the center of the nail, then drag it downward slightly to form the ghost’s body. Use the tip of a toothpick or a smaller tool to create the wavy bottom edge. Add two small black dots for eyes and a tiny dot for the mouth. Finish by sealing the design with a glossy top coat, taking care to cap the nail edge.

Tools and Supplies You Need
Having the right supplies makes ghost nail art far more enjoyable. A basic kit should include a base coat, top coat, black polish, white polish, and optional colors like orange, purple, or pastel shades. A set of dotting tools in different sizes is essential for creating round heads and eyes, while a fine nail art brush helps with details and outlines. Keep a small cleanup brush and acetone on hand for neat edges. A piece of foil or a palette is useful for holding small amounts of polish. If you plan to make glow designs, add a glow-in-the-dark polish or powder. Good lighting and a steady surface will also help your results.

Common Mistakes to Avoid
Several common errors can spoil an otherwise cute ghost design. Applying polish too thickly is one of the biggest problems, as it can cause smudging and uneven shapes. Another mistake is skipping dry time between layers, which leads to blurred lines and dents. Overcrowding the nail with too many details can make ghosts hard to recognize, so keep things simple. Using a dull or messy dotting tool may produce uneven circles, so wipe tools clean often. Finally, forgetting to seal the design with a top coat reduces durability. Take your time, work in thin layers, and practice on a sheet of paper if you feel nervous before starting.

How to Make Ghost Nails Last
A few smart habits can keep your ghost manicure looking fresh throughout the Halloween season. Always start with clean, dry nails and apply a quality base coat to help the polish adhere. Use thin layers and let each one dry thoroughly. Seal the design with a strong top coat, extending it slightly over the free edge to reduce chipping. Reapply top coat every few days to maintain shine. Wear gloves when cleaning, and avoid using your nails as tools. Moisturize your cuticles daily with oil to prevent dryness and peeling. If you choose gel polish, cure each layer properly, and remove it safely afterward to protect your natural nails.

Final Thoughts on Ghost Halloween Nails
Ghost Halloween nails prove that spooky season can be both stylish and fun. From classic white ghosts on black to pastel spirits, glowing designs, and chrome finishes, there is a version for every personality and skill level. Start simple if you are new to nail art, then experiment with colors, textures, and extra motifs as your confidence grows. Remember that preparation, thin layers, and a good top coat make all the difference. Most importantly, enjoy the creative process and let your manicure reflect your Halloween spirit. With a little practice, your ghostly nails will be the highlight of every October gathering.

I am Talha Sikandar, a professional writer with a passion for general blogging. With years of experience in content writing and research, I founded Meaniingly.com to deliver well-researched, informative, and user-friendly articles on diverse topics.